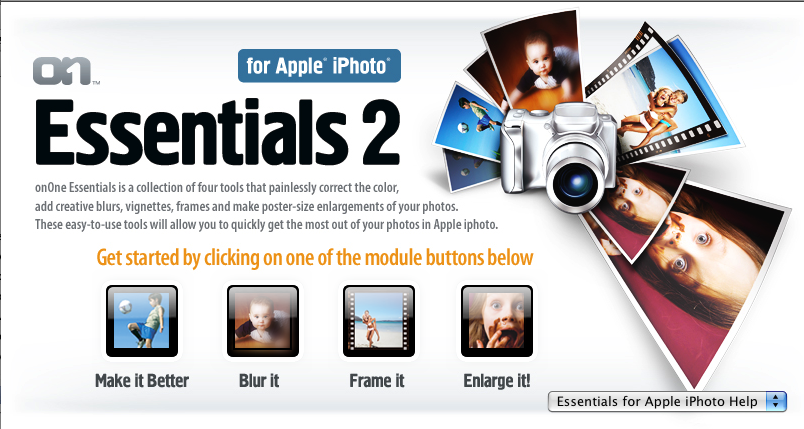
Essentials 2 for Apple iPhoto
There is little argument that Apple's premiere image editing program, iPhoto '08 is powerfully useful effective Mac users and serious amateur photographers. Apple has built the program so that nearly all the work you need to with your digital images can be completed within this one application. However, last week, onOne Software released a new plug-in, Essentials 2 for iPhoto, which is similar to other programs to other external image editing programs like Adobe Photoshop Elements. OnOne named named their application Essentials 2, but there's no prior version of the program.
For most Mac users who shoot photos, iPhoto provides all the editing and adjustments they want or have time to use. For basic and general iPhoto users, having to open photos in an external editing program is a little too time consuming or daunting. That's why I think Apple tries to keep the program as simple and fluid as possible for its consumer base.
But for iPhoto users wanting a little more control in their editing or additional image effect features, Essentials 2 just might be useful. Essentials 2 can only be used in conjunction with iPhoto. It's not a stand alone application like say Photoshop Elements. Though it opens up as an external program, you need to right- or control-click on an image file in iPhoto and select the Essentials 2 plug-in. From there you given four possible options. You can click on the Make it Better button which provides exposure and color adjustment features; you can click on Blur it, which enables you to selectively blur any part of a photo; you can choose Frame it, which provides a various masked frames that you can apply to a selected image; and finally, you can choose Enlarge it, which provides you a way to enlarge and crop various sizes of your photos. The presets for cropping go beyond the default presets in iPhoto itself.
The above option window also provides very good built-in video tutorials for how to use each of the modules, so there's little need for written documentation.
I'm not going to go into how to use each module, which like I said is covered very well in the tutorial videos. Instead, I'm going to evaluate the Make it Better and Blur-it features of the program. Each of these modules extends the range of iPhoto's expose and color correcting features and warrant evaluation.
First off, in trying out each module, it appears there's no way to undo the image adjustments or effects after clicking the Apply button, which closes the program and sends the edited image back to iPhoto. However, because iPhoto '08 has a non-destructive editing feature, your original photo remains intact where it is stored. So you can right- or control-click on the edited image and select Revert to Original if need to get rid of adjustments. Or you can do what Essential 2 developers suggest and make a duplicate copy of the image you want to edit.
iPhoto '08 vs Essentials 2's Make it Better feature
Working in the Make it Better feature is almost like getting an eye exam where you get two visual options for a letter and are ask to choose which one is more clear, the one on the left or the one on the right. When you open a photo in Make it Better, you presented with five steps which basically deal with the dynamic range of the image. With each step, you evaluate the exposure and contrast levels of the image and the overall color cast of the photo. There's no ability to selective apply adjustments in the image. Adjustments you select are applied to the entire image. These are the same type of exposure, contrast, highlight and shadows, saturation, temperature, and tint adjustments you can make with iPhoto's adjustment tools. Essentials 2's editing feature does a lot of the work for you. It suggests what might look better to you and gives you the opportunity to agree or disagree. For some iPhoto users, this type of hand-holding might be just what they need. For others, the step-by-step process might seem like less control over the adjustments they want to make. 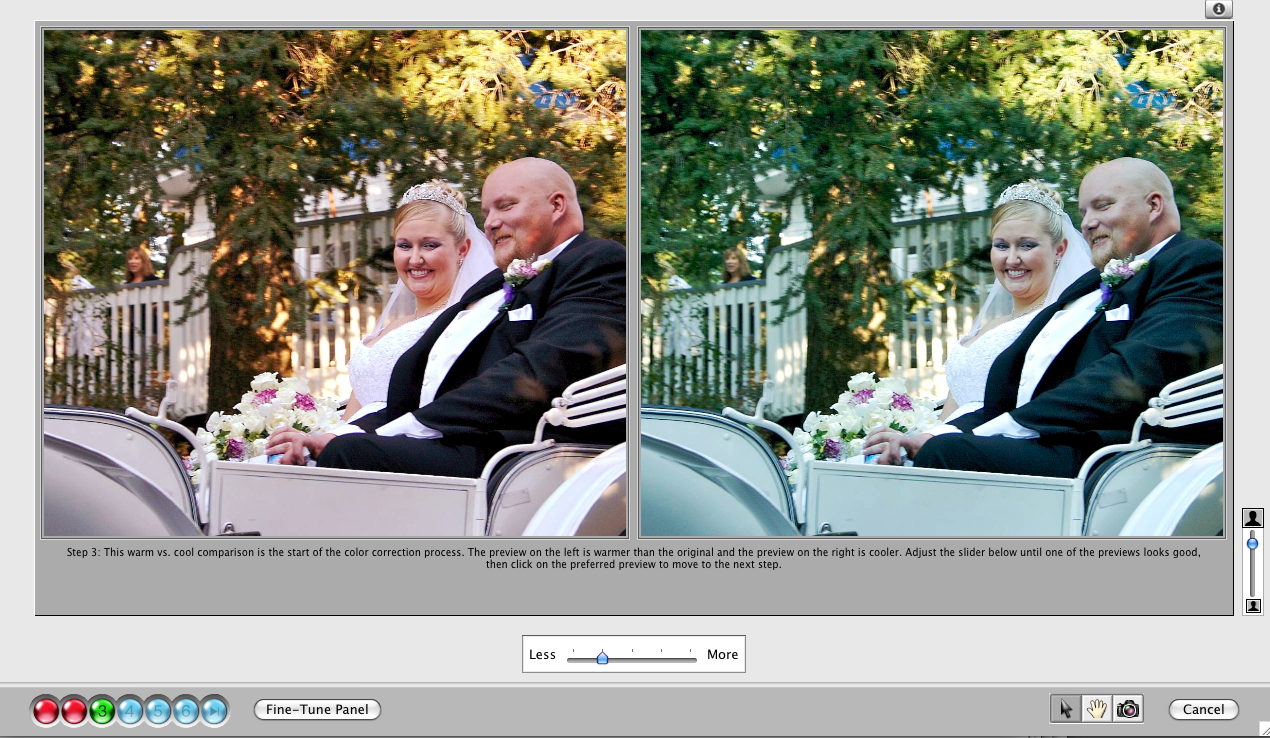
It seems as if you can achieve pretty much the same type of adjustments using iPhoto's editor that you can with Essentials 2's process. Neither editing feature provides for selective editing, nor do they provide for curves adjustments that make for detail tonal value editing. And with the Essentials 2 process, you don't get iPhoto's useful histogram graph that displays exposure levels of a selected image. Finally, I also think that Essentials' Make it Better hand-holding feature doesn't provide has much control over tonal adjustments as with iPhoto's default editor. At each stage of the editing process in Essentials 2, you can indeed increase or decrease the suggested tonal range or color casts that it suggests, but those changes (or what they call fine tuning) can only be made in increments, whereas in iPhoto, you can actually slide or click the numbers for fine tuning adjustments.
That being said, I can see how Essentials 2's editing controls could be useful for general iPhoto users. Sometimes, the feature suggests color corrections that you might otherwise overlook, depending on your skills and patience with color correcting work. However, I just don't think the editing features in this module are that much more advance than in iPhoto's default system.
Blur-it
Essential 2's Blur-it modules does what iPhoto can't do. Let's face it, the camera and lenses most people use lack the needed focal length and/or wide enough aperture to create a shallow depth of field in most shooting situations. I have a Canon Powershot G9 with a f/2.8 lens, but because of the focal length of the lens, it can't create a good shallow depth of field in the way the my Canon 70-200mm f/2.8 lens can. There's simply no comparison. So Essentials Blur-it feature comes to rescue. Using it, you can selectively blur a part a part of a photo, which will typically be the background of an image, keeping the foreground subject sharp.
The Blur-it module has has numerous tools for how and what type of blur effect you want to make. You can for example make a very soft Gaussian blur to a more hard edge blur. Using what is called the focus bug, you establish a grid around the part of the photo that you want to keep in focus and sharp. They call that part the "sweet spot." The area outside the grid gets the blur effect applied to it. This works pretty great if you only have one subject in the photo, but I could not find a way to keep the focus on more than one part of an image, as in the example I include below. In this example, I couldn't keep the officiate, the groom, and the bride in focus all at the same time, while blurring the background. That level of control simply doesn't seem to be there. Once the effect was applied to the groom and the officiate, I tried re-opening it to fix the blurring of the bride. But the damage had been done. I couldn't bring her back into focus. I ended up reverting the image back to it's original state. There was nothing in video tutorials that demonstrated how to apply the blur effect independently to two or more areas of a photo.
Despite these issues, I think for avid iPhoto users not very interested in getting too far beyond Apple's premier image adjustment program, Essentials 2 is a good addition to iPhoto. The other two models, Frame it and Enlarge it, seem pretty functional, and over time I think the entire Essentials 2 program will grow and become a useful external editing program for iPhoto users.
 del.icio.us
 Digg
Digg Facebook
 Slashdot
 StumbleUpon

Comments
“There is little argument that Apple’s premiere image editing program, iPhoto ‘08 is powerfully useful effective Mac users and serious amateur photographers.”
The lack of arguement may be due to the fact that before your startling revelation, few people suspected that the software was in fact a human.